Before & After: Our Moody and Minimalist Bedroom
Our bedroom redesign presented some interesting challenges, but it’s one of my favorite transformations. This room was probably the trickiest to design, simply because it doesn’t get as much light.
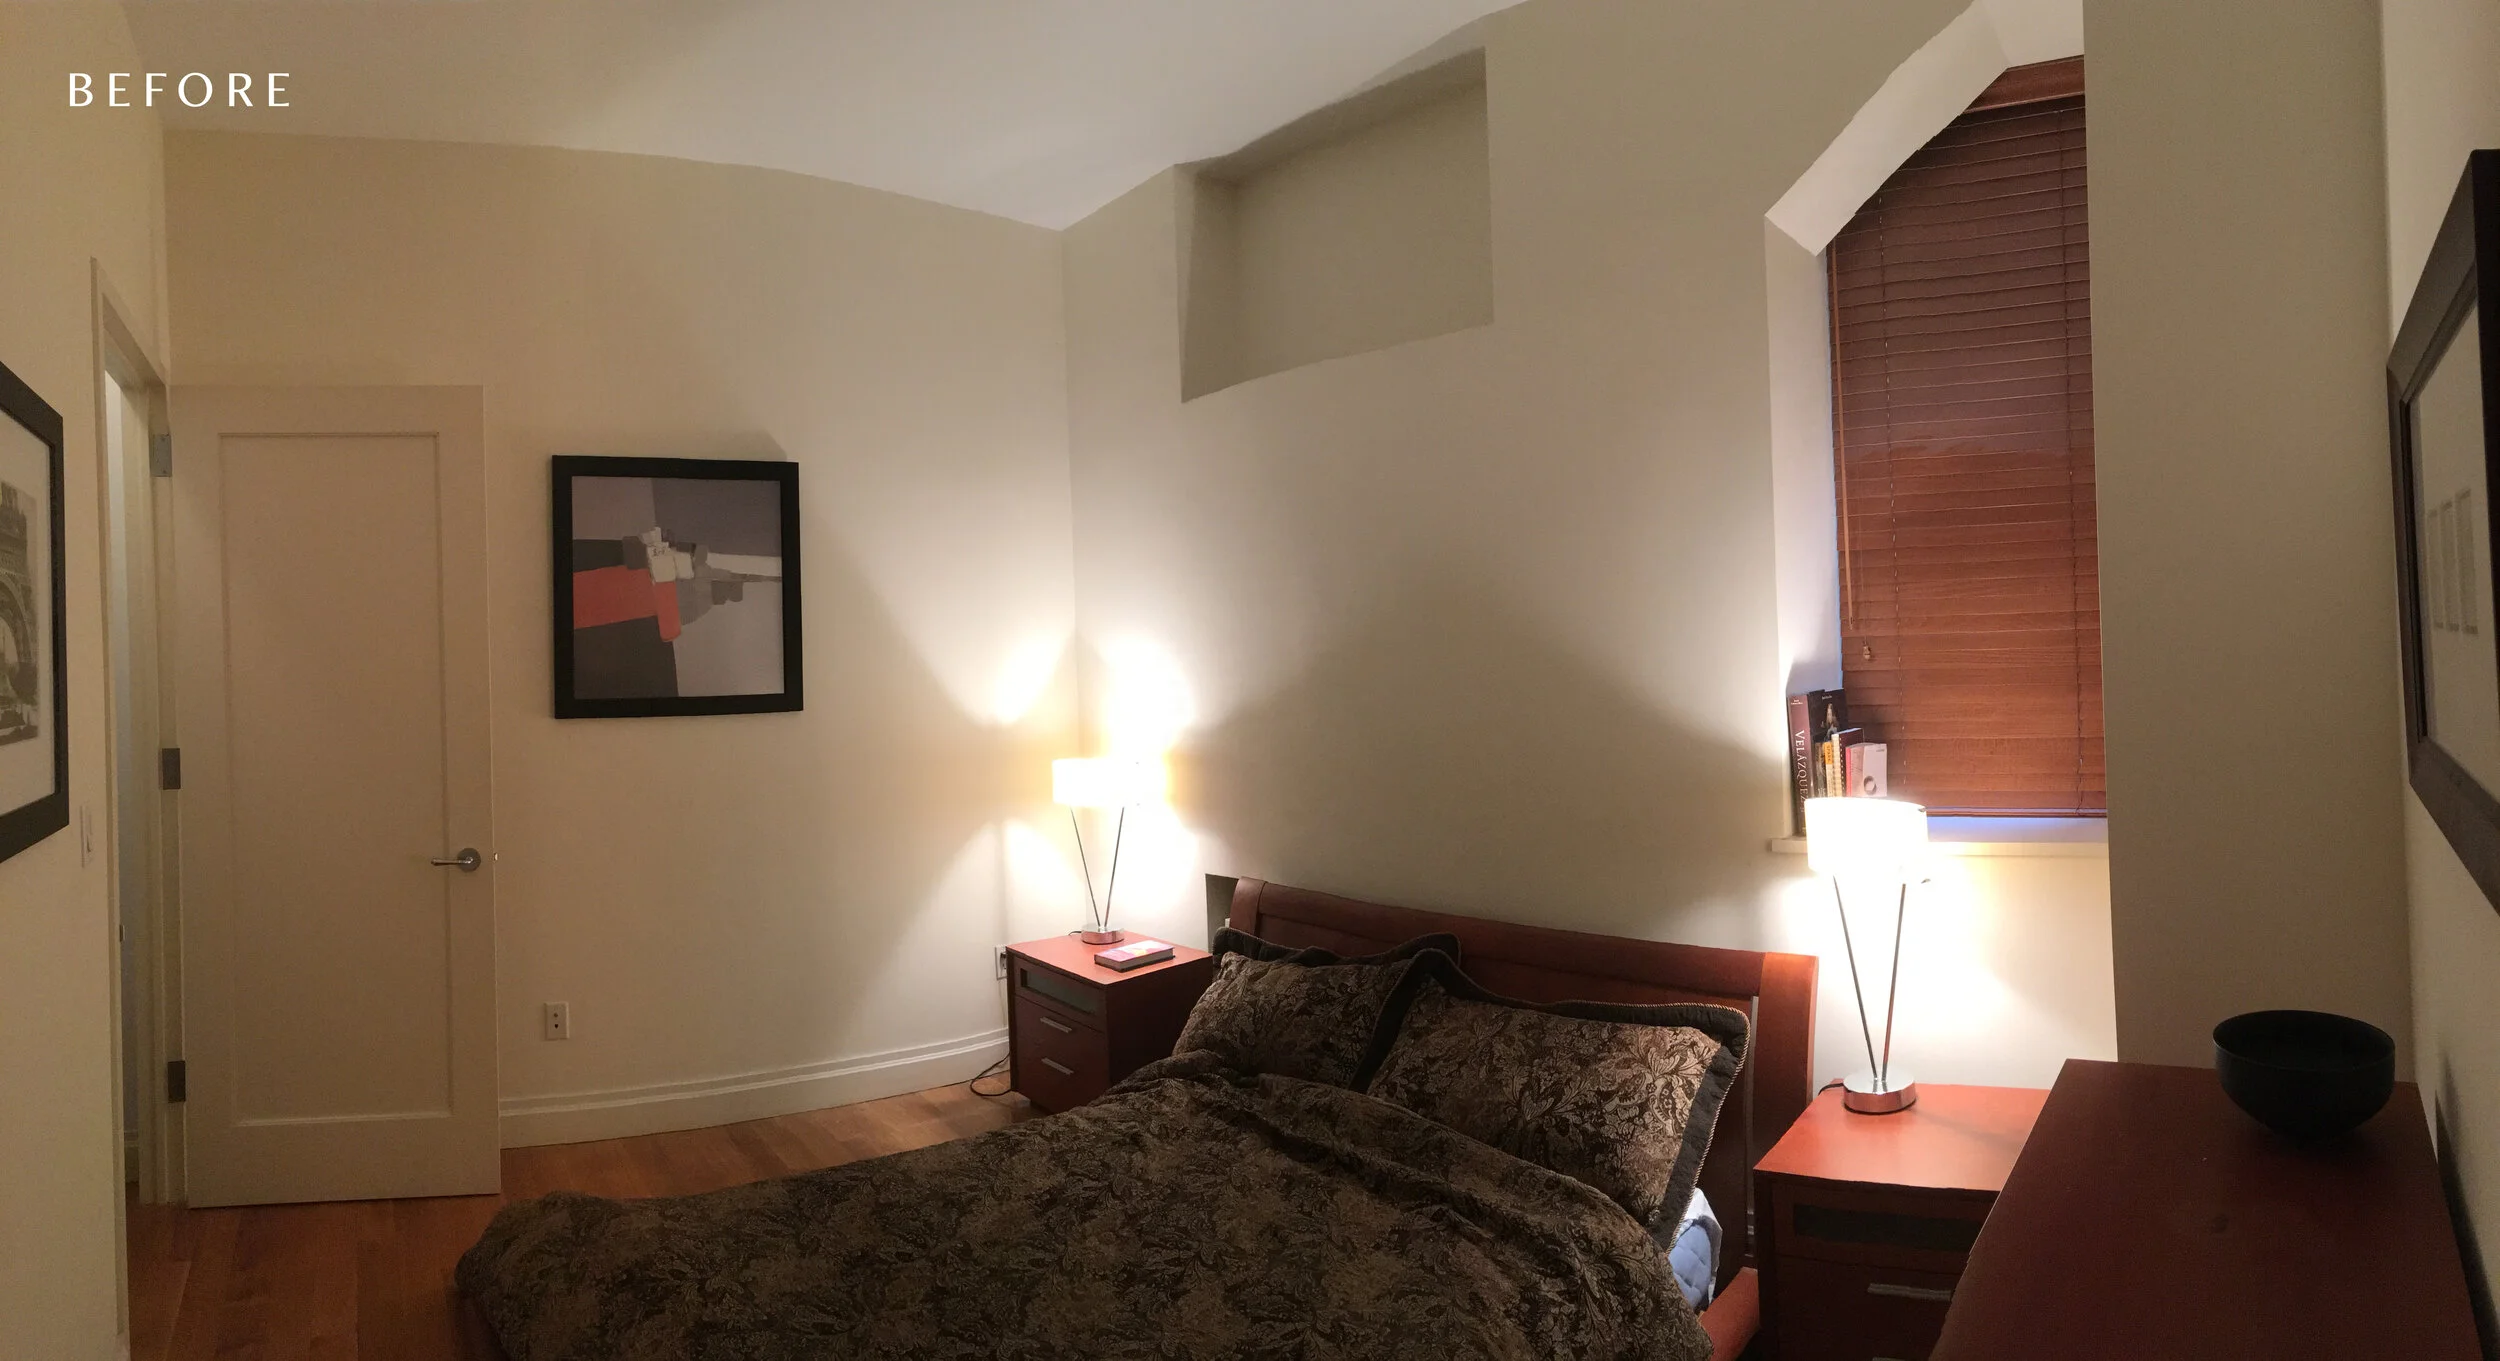
From a layout perspective, our bedroom is slightly bigger than the average NYC bedroom, but it’s a bit odd with one small recessed window and a couple odd cubby holes in the walls, including a cubby for the AC unit that was being entirely covered by the previous placement of the bed in this before photo below.
So, how do you make a dark room with limited light feel cozy? You join the dark side.


The After
Moody & Minimalist
There’s a common misconception with dark rooms that you should never paint them dark because it’ll just make it worse. Quite the opposite is true actually.
You see, if you paint a dark room white, it’ll just look like a dark white room (or more likely, a grey/taupe room, like ours). You’re fighting a reality you can’t win. Instead, we chose to go with the flow and paint the headboard wall a moody emerald green, which, by contrast of being the darkest focal point, makes the rest of the room pop.

The Process
The biggest decision wasn’t choosing whether or not to paint the wall (because I knew I wanted to go dark from the beginning), but it was choosing the color itself. I must have spent weeks taping paint swatches to the walls and cross referencing colors with lighting environments. Finally, I settled on Hunter Green by Benjamin Moore and I’m thrilled with the results. Take a look for yourself below. The Lesson? Go with the flow, don’t fight it.


ALL IN THE DETAILS
The Finishing Touches
CREATING COZY LIGHTING: For lighting, we wanted to avoid overhead lights which often make a place feel dreary. Instead, we opted for these two brass sconces from Amazon, though as you can tell by the photos, the glass orbs that cover the lightbulbs didn’t last very long!
CHOOSING NO NIGHTSTANDS: Instead of nightstands, which felt bulky and unnecessary, we installed these vertical concealed floating bookshelves for our collection of books, the bottom row of which acts as a mini nightstand of sorts. This helps keep the place clear of clutter and makes us keep only what is totally necessary. The shelves are essentially metal brackets that are $25 for a pack of 3, so the total cost was just $75 and we even had a few shelves left over.


Before
The Closet
The closet, just like the bedroom, suffered from lack of imagination. It’s a pretty standard layout, but it too needed some rearranging and reworking to optimize the space to its full potential. When we first moved in, this closet had a single shelf with a railing, with a ton of stuff piled at the bottom and no way to use the vertical space above.

AFTER
Where Form Meets Function
Right away I knew I wanted it to match the bedroom and feel like an extension of the space. Thankfully, when we measured the closet, it was a perfect fit for two custom IKEA Pax systems, which we assembled and installed ourselves. Sounds easy, but like any IKEA product assembly, it nearly caused a massive fight! Rookie mistake #1 was assembling the entire system outside of the closet itself and then attempting to fit both units through the closet door. Now remember, these were planned to be 100% flush with the inside of the closet, which was significantly wider than the door. Much to our horror, it meant we had to disassemble, yes, disassemble, the whole unit and start from scratch. We did get it right eventually and the result was amazing! It feels like we have a custom walk in closet now.


In-closet drawers helped us avoid needing any extra dressers, which in turn freed up the bedroom to live us to our minimalist and uncluttered ambitions for it. (Well, most of the time at least!)

I had initially hoped to avoid an over the door shoe rack, but as long as they aren’t piled in a heap on the floor, I’m happy!
Adding A Touch Of The Unexpected
Remember the odd window and bulky furniture? That became my favorite DIY Project of all time: our suspended open wardrobe.


If you’re curious how we built that, or want to learn a few different design tricks on how I style it, click on these links.

